
Ottoman Bed Gas Lift Fitting Instructions
How To Assemble Your Ottoman Bed
Now it's time to set up your dream bed! Assembling an ottoman bed is an easy process. All you need to do is follow the instructions properly. First, take your time to attentively unpack each and everything and familiarize yourself with all its accessories. Once you read the instructions, let's get started.
Tools Required: Spanners and Allen keys
Prepare Your Space
You need to have enough room space to assemble any bed. Make sure your room is empty so that after assembling, you can easily position it. To protect your flooring, lay down a mat on the ground. Place some thick material under the legs to stop the bed from moving.
Familiarize Yourself With Tools
Make sure you know which tool is used for what purpose. Set all the tools near you in order so that you know what you will be doing next.
Important Safety Points
- Ensure you have a spacious and dry place before starting
- All appropriate tools are assembled and within reach
- Make sure the legs are in firm contact with the ground
- Do not use any power tools as they may damage the product
- Do not tighten all screws before adjusting all parts
- Do not use the bed while installing the lifting mechanism
- After installation, check if the mechanism is operating properly
Fitting Chrome Feet/Castors
The first step is to simply push the feet into each socket, 4 chrome glides per base unit.

Connect Gas Pistons
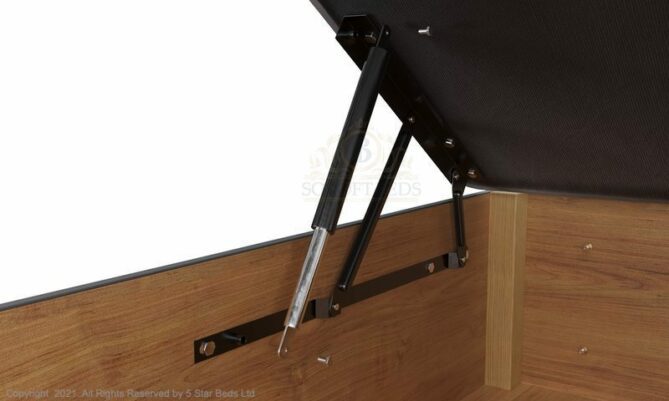
Connect gas pistons to the lid hinge and the base hinge points. Bolts are supplied and fitted to hinge.
Position the Ottoman Bed Base Units
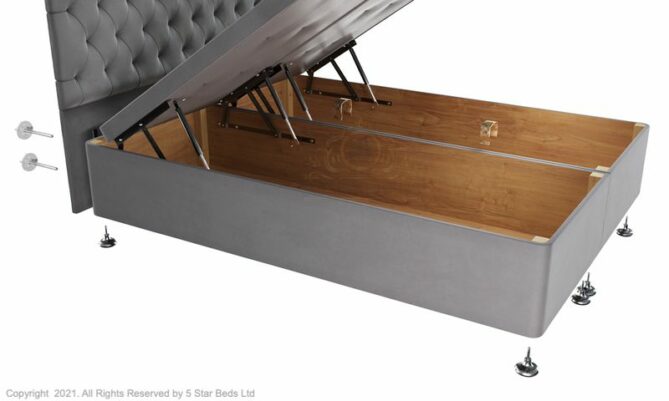
Set the ottoman base units into position (rounded corners on the outside – as per the illustration).
Fit U-Clips Between the Ottoman Bed Base Units
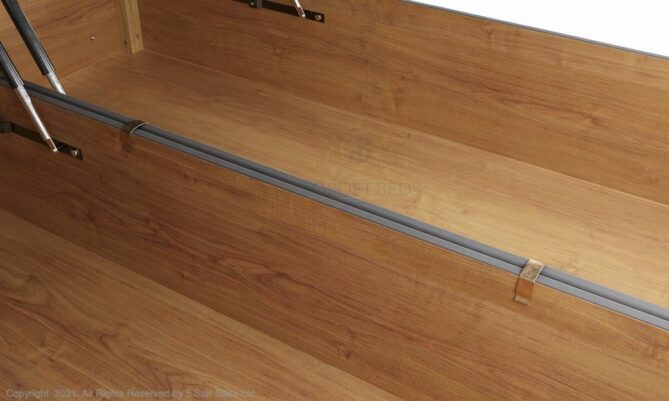
Slide the 2 U clips on to secure the two bases together.
Secure The Ottoman Bed Lids
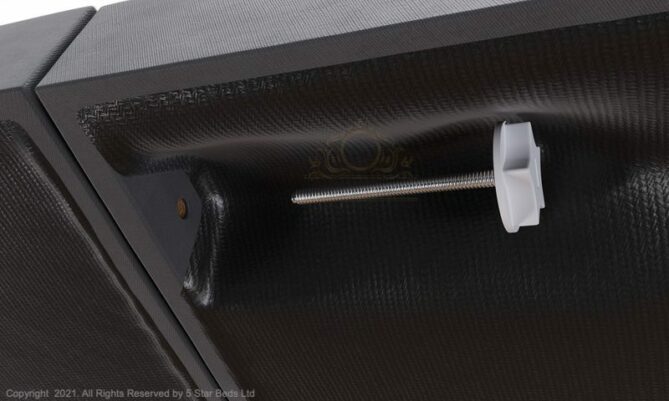
Using the 100mm plastic headed bolt, secure the lids together.
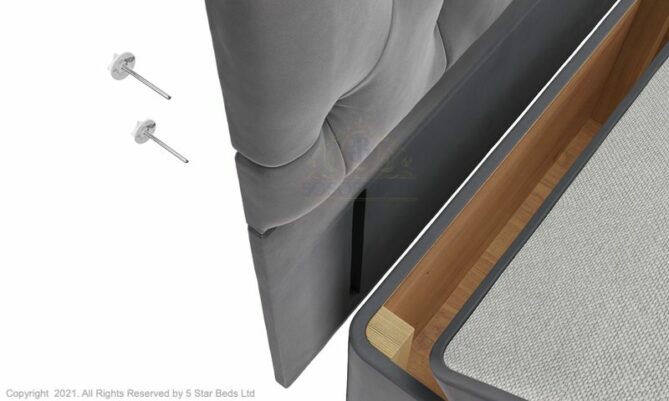
Securing The Headboard - End Lift Bed Base
Ottoman End Lift Headboard Fitting Procedure
First locate the holes on the base by opening the bed base. Under normal circumstances, stickers are visible in the hole positions.
If you are using a floor standing headboard, use the short bolts to secure the headboard into place.
Repeat the above if you have a headboard with wooden struts.
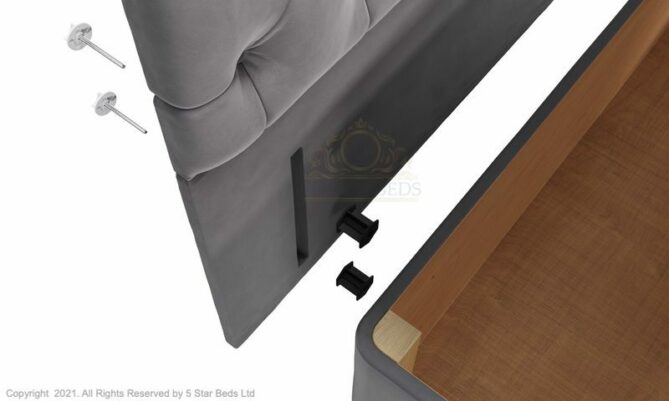
Securing The Headboard - Side Lift Bed Base
Ottoman Side Lift Headboard Fitting Procedure
Prior to fitting the headboard, locate the holes on the base unit by running your fingers over the bolt holes. Under normal circumstances, stickers are visible in these positions.
If you are using a floor standing headboard, secure the headboard with 4 x 100mm long bolts and position the spacers between the headboard and base units.
Repeat the above if you have a headboard with wooden struts.
Important Note:
Adding the Mattress: These ottoman beds are designed so you need to apply the least amount of effort to lift the mattress. To put the mattress on the bed base, this must be done by 2 people.
- Person 1: Hold the lids down
- Person 2: Add the mattress to the base top
Once the mattress is in place, you're all set to enjoy your new ottoman bed!